TCP-Wedge is for data collection from Ethernet and TCP/IP-connected Scales, Balances, Meters, Gages and other devices.
For data collection from RS232 or RS232-to-USB connected devices, please go to the WinWedge Quick Start guide.
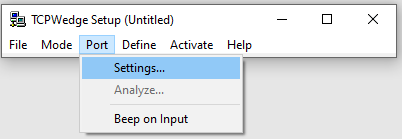
Step 1: Select Port Settings
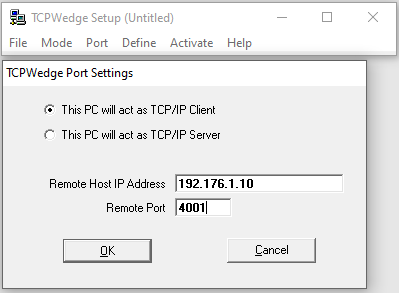
TCP-Wedge requires that you establish a client or server connection with an IP address and port number.
- “This PC will act as TCP/IP Client” is most common—your PC will receive data from a scale or device on the network. This requires that you know the Remote IP Address of that device, along with the Remote Port that it communicates over.
- “This PC will act as TCP/IP Server”—your PC will provide data to clients using the IP address of your PC with the port number of your choosing. This requires that your remote client device be configured to connect to this IP address and port.
Step 2: Analyze the Input Data
Next, you need to verify that the data is being received correctly and identify anything you might want to filter or separate when you transmit to your target app.
Go to “Port” > “Analyze” in the TCP-Wedge menu.

If TCP-Wedge is the Client and the title bar of the Analyze window does not say “Connected,” then you are not connected to the remote device/server. Check that TCP-Wedge is using the right IP Address and Port Number for the device in Step 1, and that your device is connected to the network.
If TCP-Wedge is the Server and the Title Bar of the Analyze window says “Listening” indefinitely, then your client device is not connecting to TCP-Wedge. Check that your device is using the IP Address and Port Number that you had selected in the TCPWedge Port Settings window, and that your devices are connected to the network.
If the title bar of the Analyze window says “Connected,” then the “Input Data” textbox will show the raw data that is sent from the device that you are connected to.
If “Input Data” shows no data:
- Your device(s) may not be sending data.
- Make sure the device is turned on and connected to network
- Try pressing the “Print” or “Transmit” button on device
- If there is no Print or Transmit button on your device, you may need to send a command to the device from TCP-Wedge to request data. Check the device manual for the “Transmit” command and enter in the OUTPUT box. If the command contains odd characters, like a music note and box with hole, click the “ASCII chart” button to find these (in this case an ASCII 13 and ASCII 10 – the CR and LF characters)
- Make sure you have the correct IP address.
Once you have readable data values in the Input Data text box, make a note of the data’s format—including ASCII characters (such as musical notes), the first & last characters, and any separating characters (a.k.a. delimiters such as commas or spaces). If the data consists of fixed length fields, selecting each field in the INPUT box will tell you their length.
You will need this for Step 4.
See the WinWedge Quick Start Guide for the remaining steps.
WinWedge and TCP-Wedge are similar enough that their remaining steps from here-on are identical. Please refer to the WinWedge Start Guide’s Steps 3, 4, and 5 to select your mode, define the data structure, and start capturing data.